Step-by-Step Guide to Installing and Configuring HAProxy on Ubuntu

Heya! 👋 I love helping people, and one of the best ways I do this is by sharing my knowledge and experiences. My journey reflects the power of growth and transformation, and I’m here to document and share it with you.
I started as a pharmacist, practicing at a tertiary hospital in the Northern Region of Ghana. There, I saw firsthand the challenges in healthcare delivery and became fascinated by how technology could offer solutions. This sparked my interest in digital health, a field I believe holds the key to revolutionizing healthcare.
Determined to contribute, I taught myself programming, mastering tools like HTML, CSS, JavaScript, React, PHP, and more. But I craved deeper knowledge and practical experience. That’s when I joined the ALX Software Engineering program, which became a turning point. Spending over 70 hours a week learning, coding, and collaborating, I transitioned fully into tech.
Today, I am a Software Engineer and Digital Health Solutions Architect, building and contributing to innovative digital health solutions. I combine my healthcare expertise with technical skills to create impactful tools that solve real-world problems in health delivery.
Imposter syndrome has been part of my journey, but I’ve learned to embrace it as a sign of growth. Livestreaming my learning process, receiving feedback, and building in public have been crucial in overcoming self-doubt. Each experience has strengthened my belief in showing up, staying consistent, and growing through challenges.
Through this platform, I document my lessons, challenges, and successes to inspire and guide others—whether you’re transitioning careers, exploring digital health, or diving into software development.
I believe in accountability and the value of shared growth. Your feedback keeps me grounded and motivated to continue this journey. Let’s connect, learn, and grow together! 🚀
My first encounter with a load balancer was when I was studying for my AWS practitioner certification exams. At the time, I was really finding it difficult to grasp the concept. But with time, I came to understand its importance.
Just today, as part of our project for the day (ALX Software Engineering Program), we were given three different servers and asked to configure one of them to be a load balancer that shared the load between the other two servers.
I am therefore going to give you a step-by-step guide on how I installed and configured HAProxy, which is the load balancer software we used.
Unlike the other services that I have ever installed on a server, HAProxy was a bit different. It required me to know the version of Ubuntu I was using on the server. So, let's take a look at how I went about it.
Below is a summary of the steps that I followed:
Connect to my server through SSH
Check the version of Ubuntu that was running on my server
Get the specific HAProxy package for your version of Ubuntu
Configure HAProxy to share requests between two servers
Restart HAProxy
Connecting to Ubuntu Server using SSH
There are a couple of ways to connect to a remote Ubuntu server. Using SSH is a common and very secure way. To get access to the server, we need to connect via SSH.
Since you are using SSH, it is required that the local machine that you are using to access the remote server have a private key that matches a public key on the remote server.
If that is so, you can easily connect to the remote server by running the command below on your terminal.
ssh username@ip_address_of_remote_server
Where ip_address_of_remote_server is replaced with the actual IP Address of your server and username is replaced with your username or and authorized username on the remote server.
If it doesn't work or you get a permission denied error, then you may have to explicitly provide the path to your identity file (your private key). You can do this with the help of the -i option.
If your private key is stored in a file called id_rsa which is located in the ~/.ssh/ directory, then your command for connecting to the server becomes:
ssh -i ~/.ssh/id_rsa username@ip_address_of_remote_server
Check the version of Ubuntu that was running on my server
Once, you have successfully connected to the remote Ubuntu server, you need to check the version of Ubuntu installed on it. To find it, run the command below:
lsb_release -a
In my case, my remote server was running Ubuntu version 20.04. It may be different for yours, but for the rest of this post, I will be using this version.
This means that anywhere you see me use this version, you would have to replace it with your version when trying to implement it at your end.
Get the specific HAProxy package for your version of Ubuntu
To get the specific HAProxy package as well as details on its installation for your version of Ubuntu, you need to visit the Debian/Ubuntu HAProxy packages website.
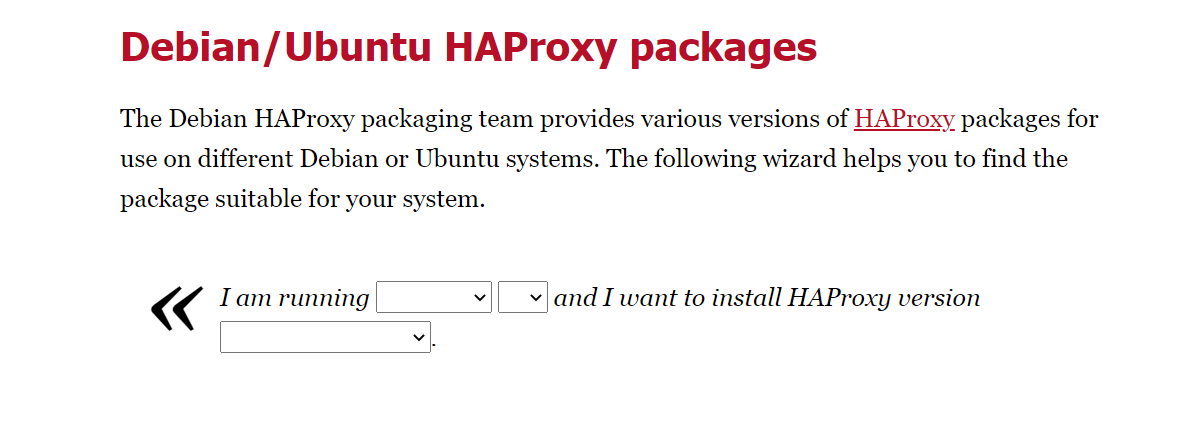
Just as you can see from the image above, you will need to provide three different details. They are:
The operating system you are running on your server (Ubuntu in our case)
The version of Ubuntu you are running (20.04 in my case)
- The version of HAProxy you want to install
The image below shows the values I provided for my use case.
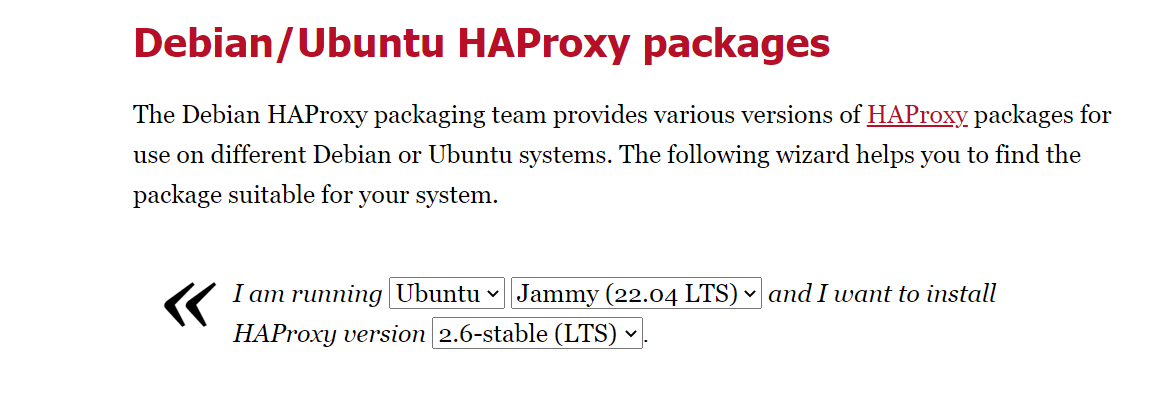
After providing these details, you get the instructions on how to install HAProxy on your server.

The three commands provided are to be run in that order.
apt-get install --no-install-recommends software-properties-common
add-apt-repository ppa:vbernat/haproxy-2.6
apt-get install haproxy=2.6.\*
After you have successfully run all the above commands, you will now have HAProxy installed on your server.
Configure HAProxy to share requests between two servers
To configure the HAProxy, you will need to identify the algorithm you are going to use for load balancing and also the IP addresses of the servers you will be distributing the load amongst.
Let's use hypothetical values for these in order to make it more practical. Here are the details:
| Sample Values | ||
| Algorithm | roundrobin | |
| Server1 | name: web-01 | IP-address: 100.25.10.201 |
| Server2 | name: web-02 | IP-address: 100.25.10.202 |
| Port | 80 |
We will need to configure both the frontend and the backend for the HAProxy load balancer. A sample configuration will look like this:
frontend  ehoneah-frontend
        bind *:80
        mode http
        default_backend ehoneah-backend
backend ehoneah-backend
        balance roundrobin
        server web-01 100.25.10.201:80 check
        server web-02 100.25.10.202:80 check
We need to append this to the HAProxy configuration file. The configuration file is located in /etc/haproxy/haproxy.cfg. You can therefore open this file with root privileges and append the above configurations to whatever is in it.
sudo vim /etc/haproxy/haproxy.cfg
It is, however, advisable to make a copy of the original file before making changes to it so that you can always have a backup to rely on. To make a copy of it, you can run the command below:
sudo cp -a /etc/haproxy/haproxy.cfg{,.original_copy}
The command above will copy the file /etc/haproxy/haproxy.cfg to /etc/haproxy/haproxy.cfg.original_copy
Now, you can peacefully go ahead and update the configure file by appending the additional configurations for both the frontend and backend as I illustrated earlier.
The final thing you want to do is to enable HAProxy to be started by the init script. You do this by appending the command ENABLED=1 to the file /etc/default/haproxy.
You can do this by opening the file in a text editor like vim and appending the command to the content of the file. You can also do it directly by running the command below:
echo "ENABLED=1" | sudo tee -a /etc/default/haproxy
Restart HAProxy
Finally, you need to restart HAProxy for the new configurations to take effect. You can restart it with the command below:
sudo service haproxy restart
Conclusion
These few weeks have been really great. Working with servers and learning a lot of new things. This is one of the many things that I have learned how to do and look forward to sharing more of the things that we are learning with you.
If you enjoy this content and want to see more content like this, subscribe to this blog and also you can show me some support by subscribing to my YouTube channel as well.
If you love to connect with me personally, then my Twitter DMs are always open, just send me a message and let's chat.